The git pull command integrates changes from a remote repository into the current branch in your local working directory. The remote repository is the remote location all of your code and its history of changes are stored. Conversely, the local working directory is the the location on your local machine where a copy of this remote repository lives. git pull essentially updates the local copy of your code to the latest version stored in the remote repository.
For a more comprehensive overview of the different spaces that make up Git’s storage schema, see this article on Git’s history and internals.
This guide will focus on the git pull command and walk you through various scenarios and options, making it easier to understand and utilize in your Git projects.
Using git pull
At its core, git pull updates your current local branch with the latest changes from its remote counterpart. The basic syntax is:
git pull <remote> <branch>
<remote> is the name of the remote repository (often origin) and <branch> is the name of the branch you want to pull changes from.
Under the hood git pull is actually running two separate commands: git fetch which checks for any changes in the remote since the last fetch, and either git merge or git rebase , depending on how the command is configured, which then merges/rebases these changes into your local branch.
Pulling changes from the default remote branch
In order to pull changes from a remote repository, your local branch is configured with a “remote tracking branch”. This tracking branch is how Git knows which branch to track changes against.
To update your current branch with changes from its remote tracking branch run:
git pull
By default, if you run this command without arguments, it will pull changes from the branch that your current branch is tracking on the remote.
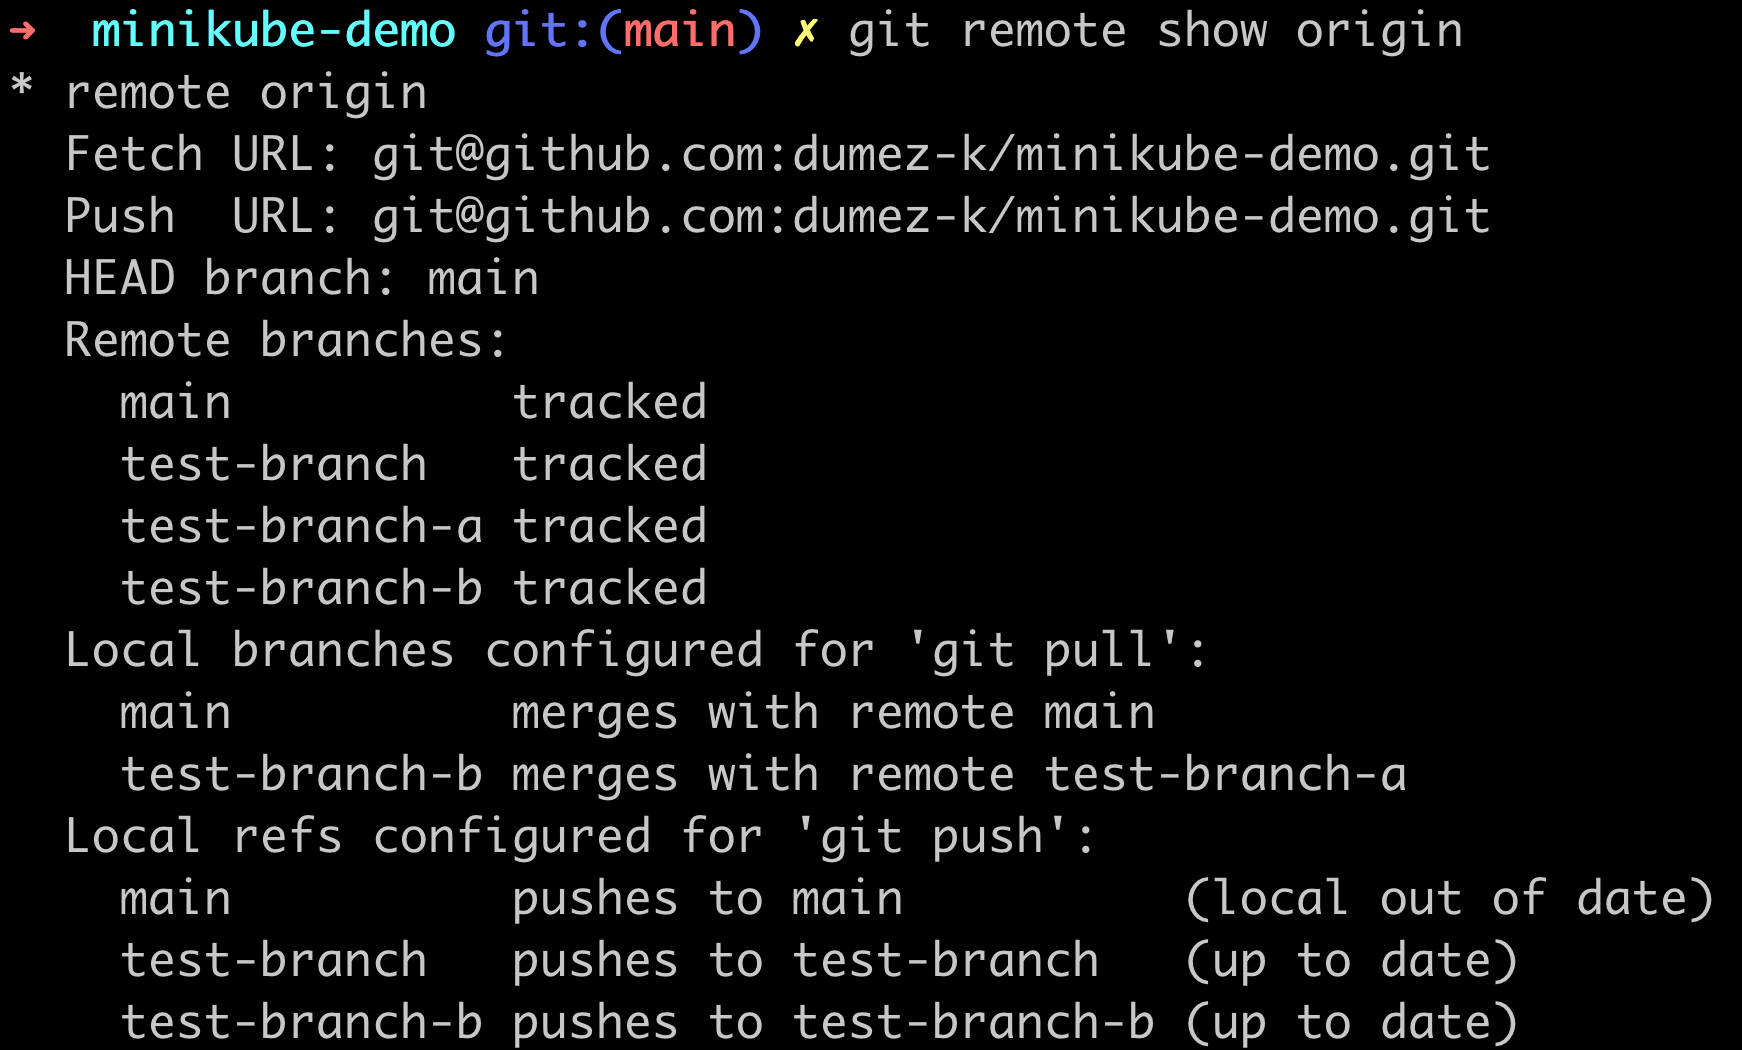
In order to see which remote tracking branch your current branch is configured to track, run:
git remote show origin
This will output a detailed list of the remote branches in your repo along with their tracking status.
Merging changes from another branch into your current branch
To merge changes from one branch into your current branch without switching branches run:
git pull <origin> <source-branch-name>:<target-branch-name>
This pulls changes from the specified <source-branch> on the remote and merges them into the local <target-branch> on your machine.
Configuring default pull behavior
Git allows you to configure the default behavior of git pull via the git config command. Using this command, you can configure whether or not a pull performs a rebase or a merge after fetching.
Git pull with merge
Default behavior: By default, Git performs a
mergewhen you execute agit pull. This command fetches the changes from the remote repository and merges them into your current branch.Merge commits: Using
mergecreates a new "merge commit" in the history every time you integrate changes. This merge commit has two parent commits: one from your local branch and one from the remote branch.Merge history: The result is a non-linear history that accurately represents the chronological order of all commits, including how branches diverged and converged over time. While this can be beneficial for understanding the project's evolution, it can also lead to a cluttered history, making the log harder to navigate.
Automatic conflict resolution: Merges also attempt to automatically combine the changes from different branches. When it's not clear how to integrate changes (e.g., when the same lines of code are modified differently in both branches), Git pauses the merge and asks the user to resolve the conflicts manually.
Git pull with rebase
To use rebase with git pull, you need to configure Git explicitly with git config pull.rebase true or use the -rebase flag when executing git pull.
For example, to set rebase as the default pull strategy for a specific branch, you can run:
git config branch.<branch-name>.rebase true
This makes Git rebase your changes on top of the changes fetched from the remote branch.
Linear history: Rebasing rewrites the project history by applying changes from the remote branch onto the local branch, one by one, without creating merge commits. This results in a linear project history, making it appear as if all changes were made in a sequential order, even if they were originally developed in parallel.
Conflict resolution: Like merge, rebase also requires manual intervention to resolve conflicts. However, conflicts need to be resolved commit by commit as the rebase process applies each commit from the remote branch onto the local branch. This can be more granular and cleaner than resolving a single, potentially complex merge conflict.
Rewriting history: Because
rebasechanges the commit hashes of local commits, it's considered a form of rewriting history. This can be dangerous if used on branches where other developers base their work because it can lead to divergent branches and complicated merge conflicts.
Choosing between merge and rebase depends on your project's workflow preferences, the need for a clean history, and how your team collaborates.
Use Merge when: You want a complete, chronological history of your project, and you don't mind the extra merge commits.
Use Rebase when: You prefer a streamlined, linear history and are willing to handle the complexities of rebasing, especially in terms of conflict resolution and the potential risks of rewriting history in a collaborative environment.
For a more detailed explanation on the differences between merge and rebase see this article on the industry shift towards rebasing.
For further reading on the git pull command, visit the official Git documentation.