Step 0 - Install the CLI
Install the Graphite CLI using either brew or npm:brew installation
npm installation
Step 1 - Understand the Graphite workflow
+The Graphite workflow consists of 5 main steps: + +1. Create a stack +2. Submit a stack +3. Address feedback +4. Merge a stack +5. Sync + clean up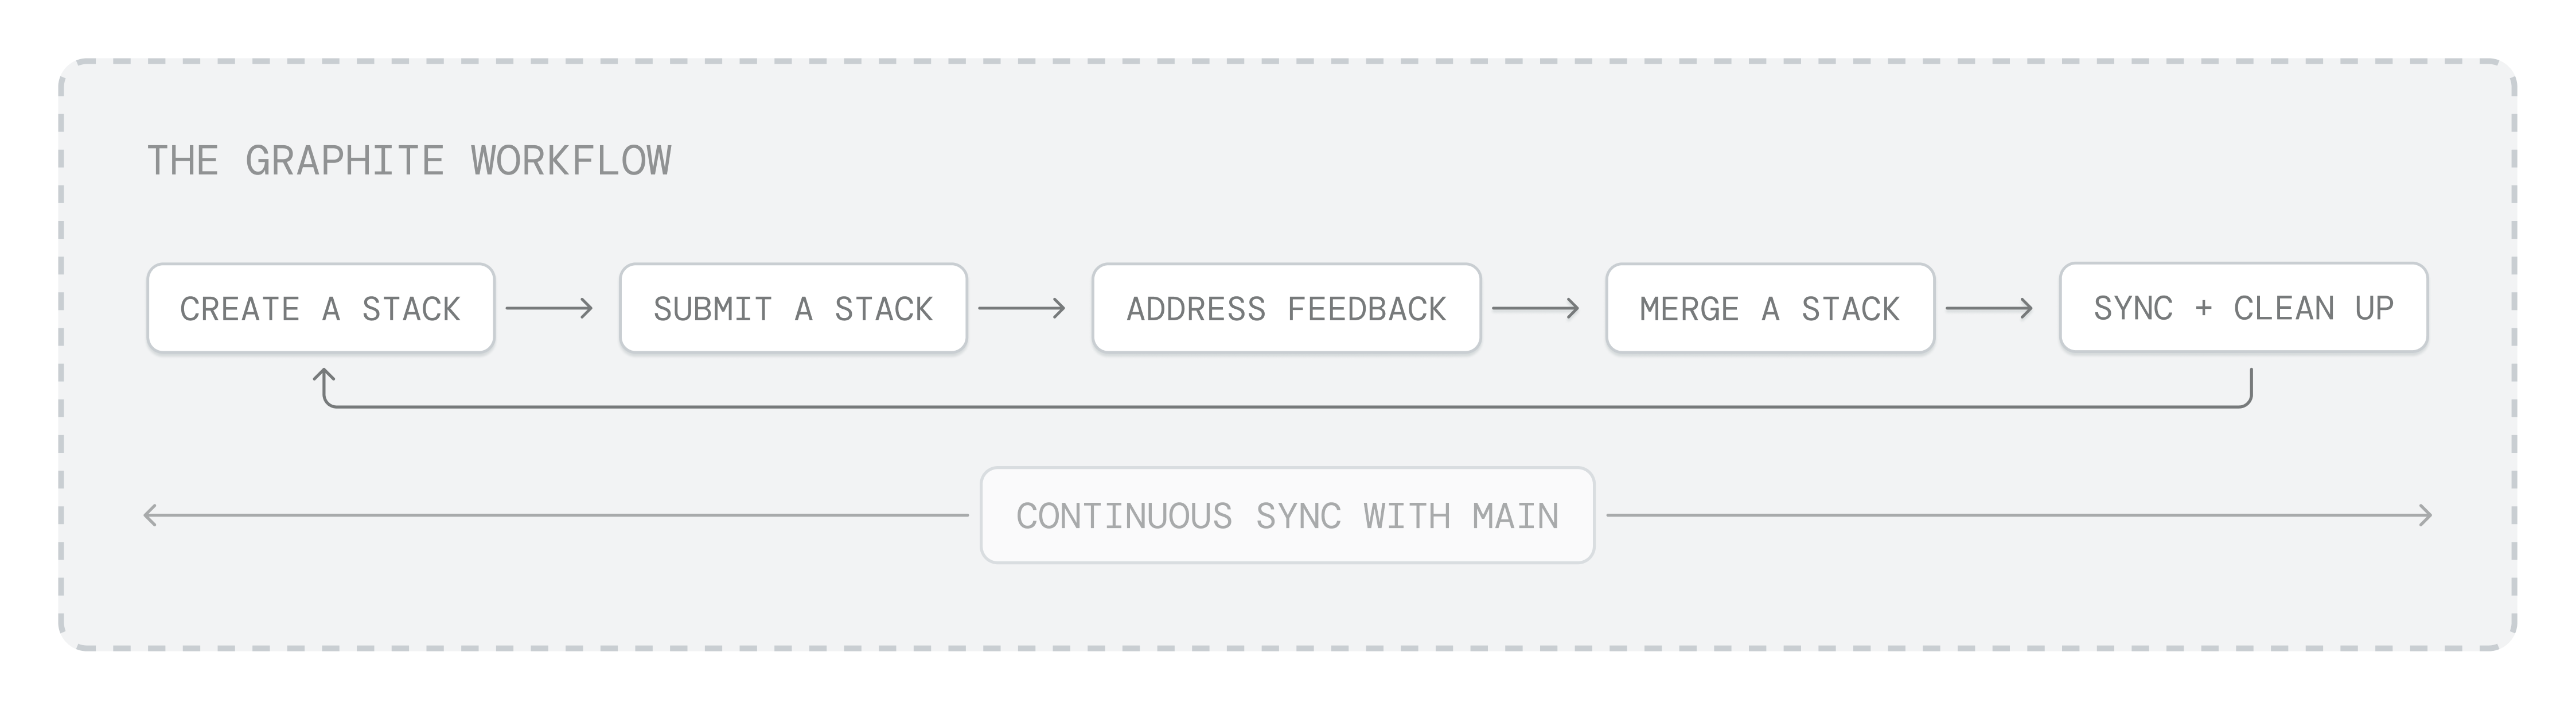
gt sync, read more below) is essentially a git pull that does some extra work under the hood to manage your dependencies, cleans up your local state, and more.
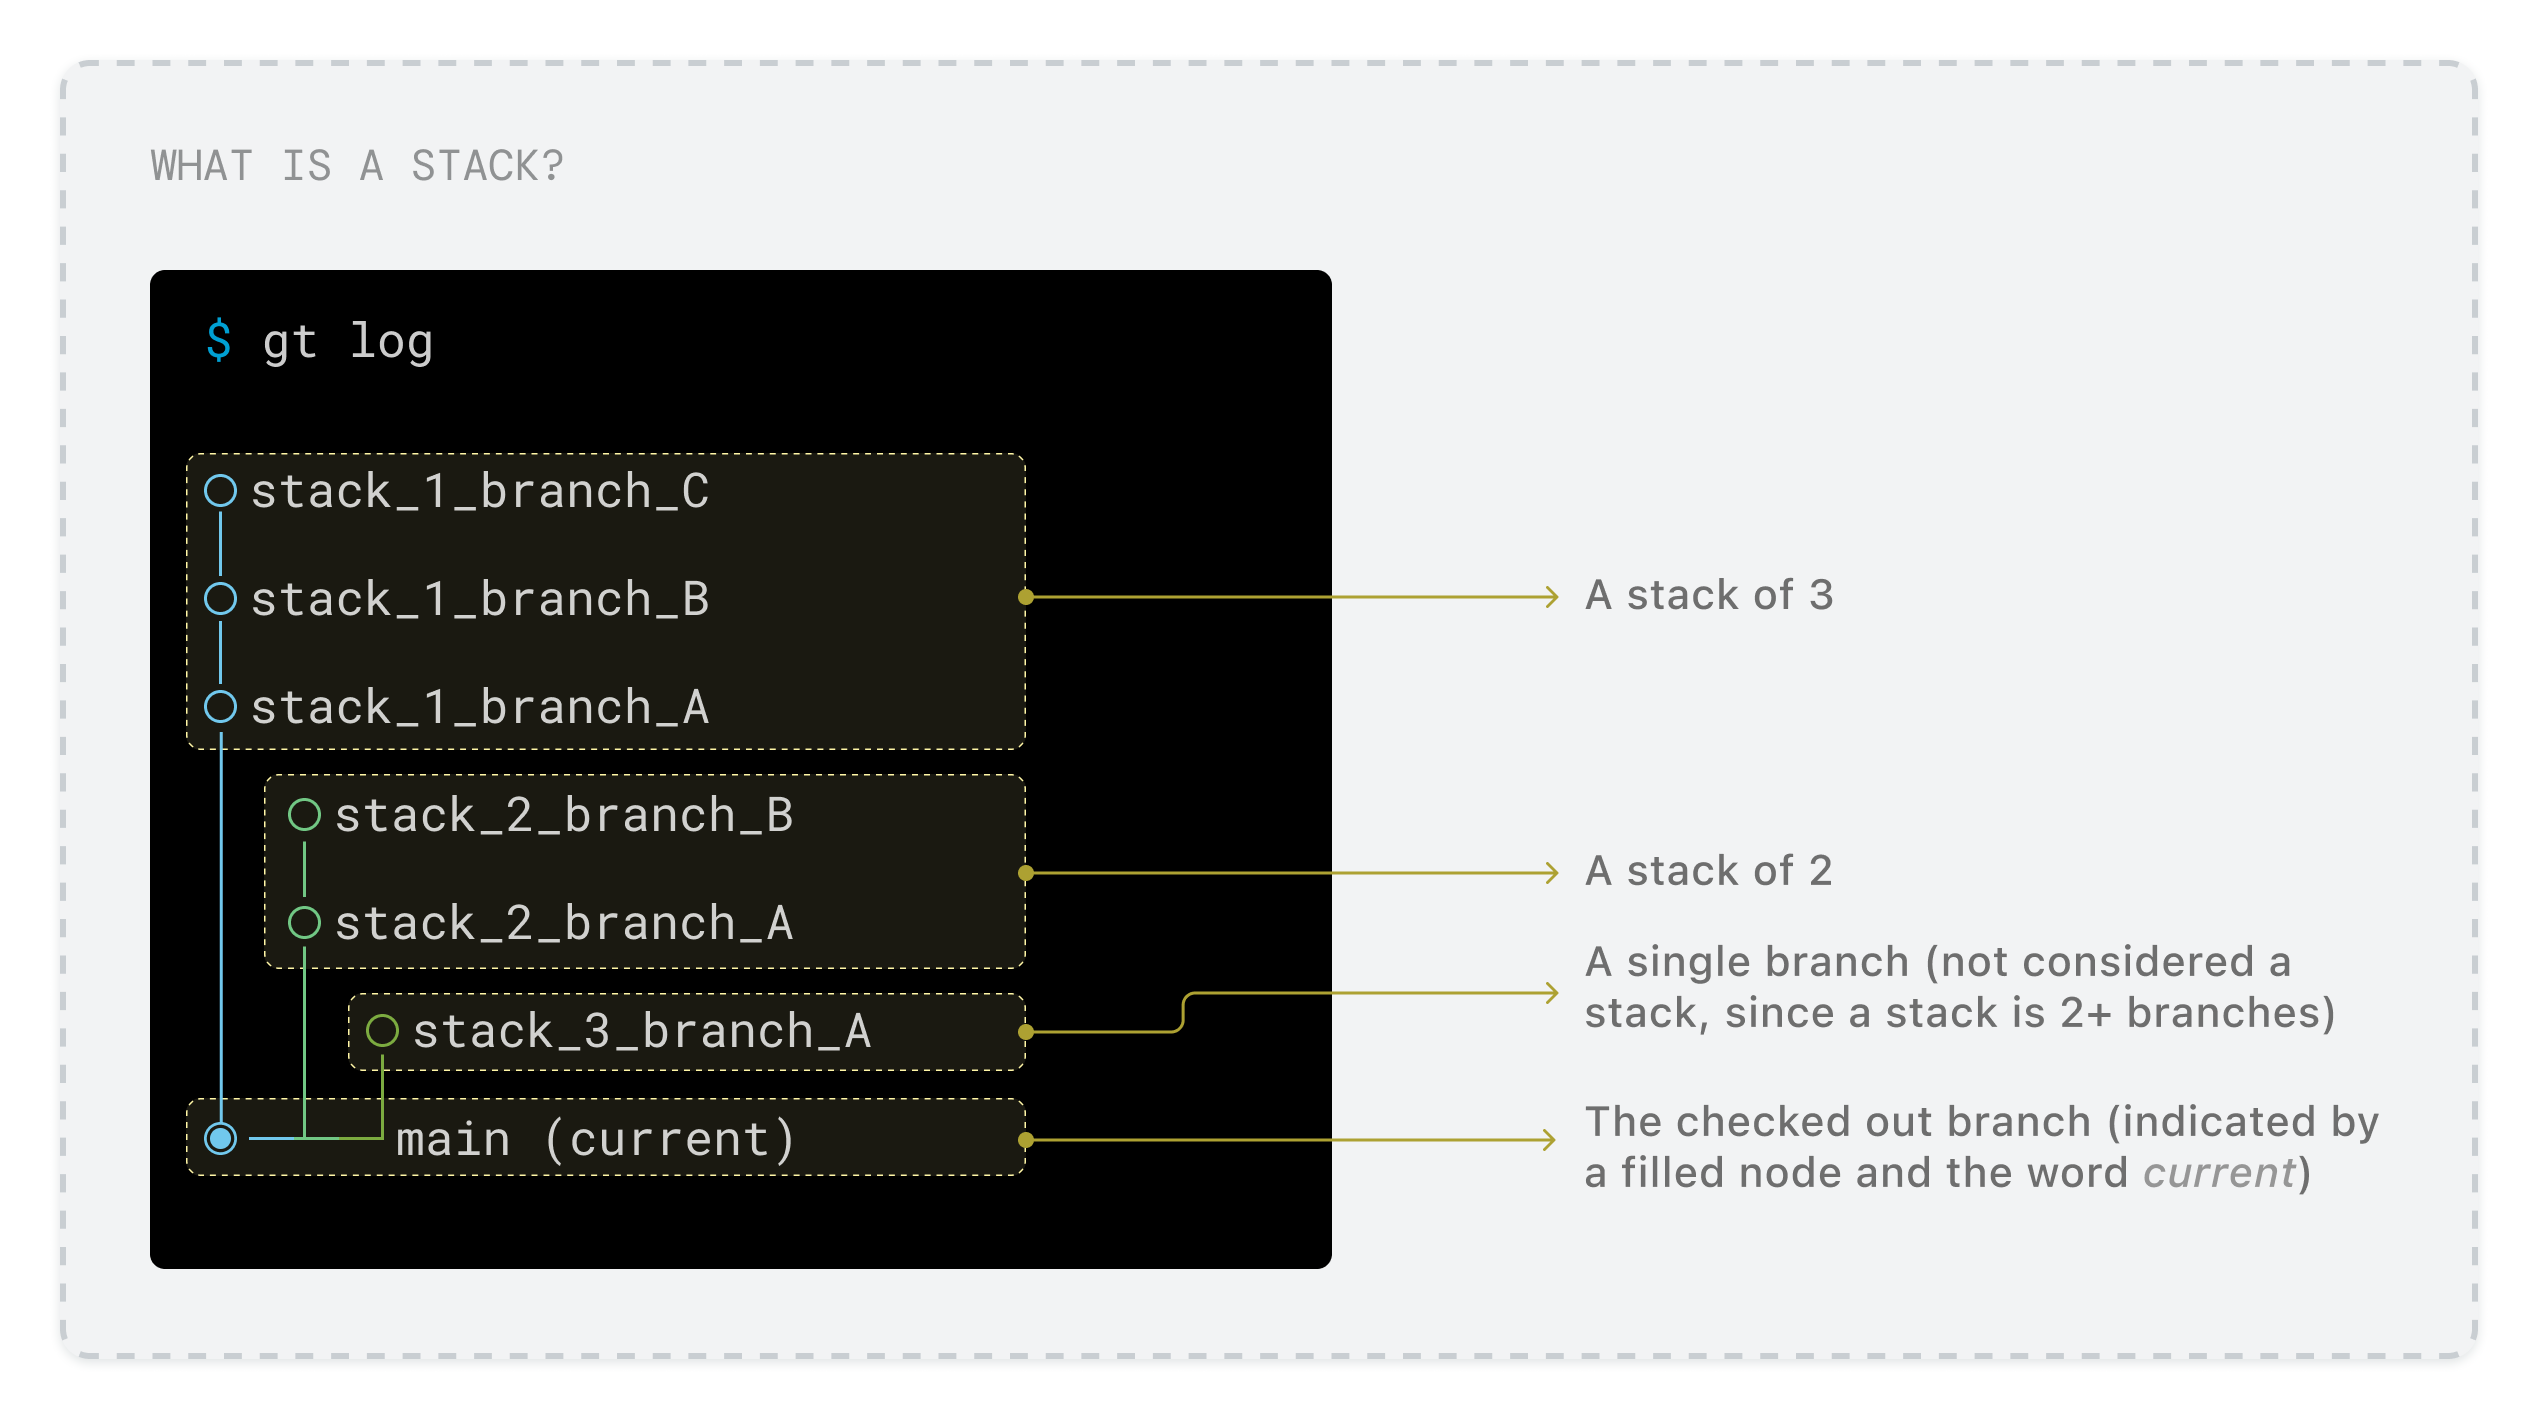
But first, what is a stack?
A stack is a sequence of pull requests, each building off of its parent. Stacks enable users to break up a large engineering task into a series of small, incremental code changes, each of which can be tested, reviewed, and merged independently. To read more about the benefits of stacking, check out https://stacking.dev. To visualize your stacks locally, simply rungt log or gt log short. Here’s how you can interpret the output:
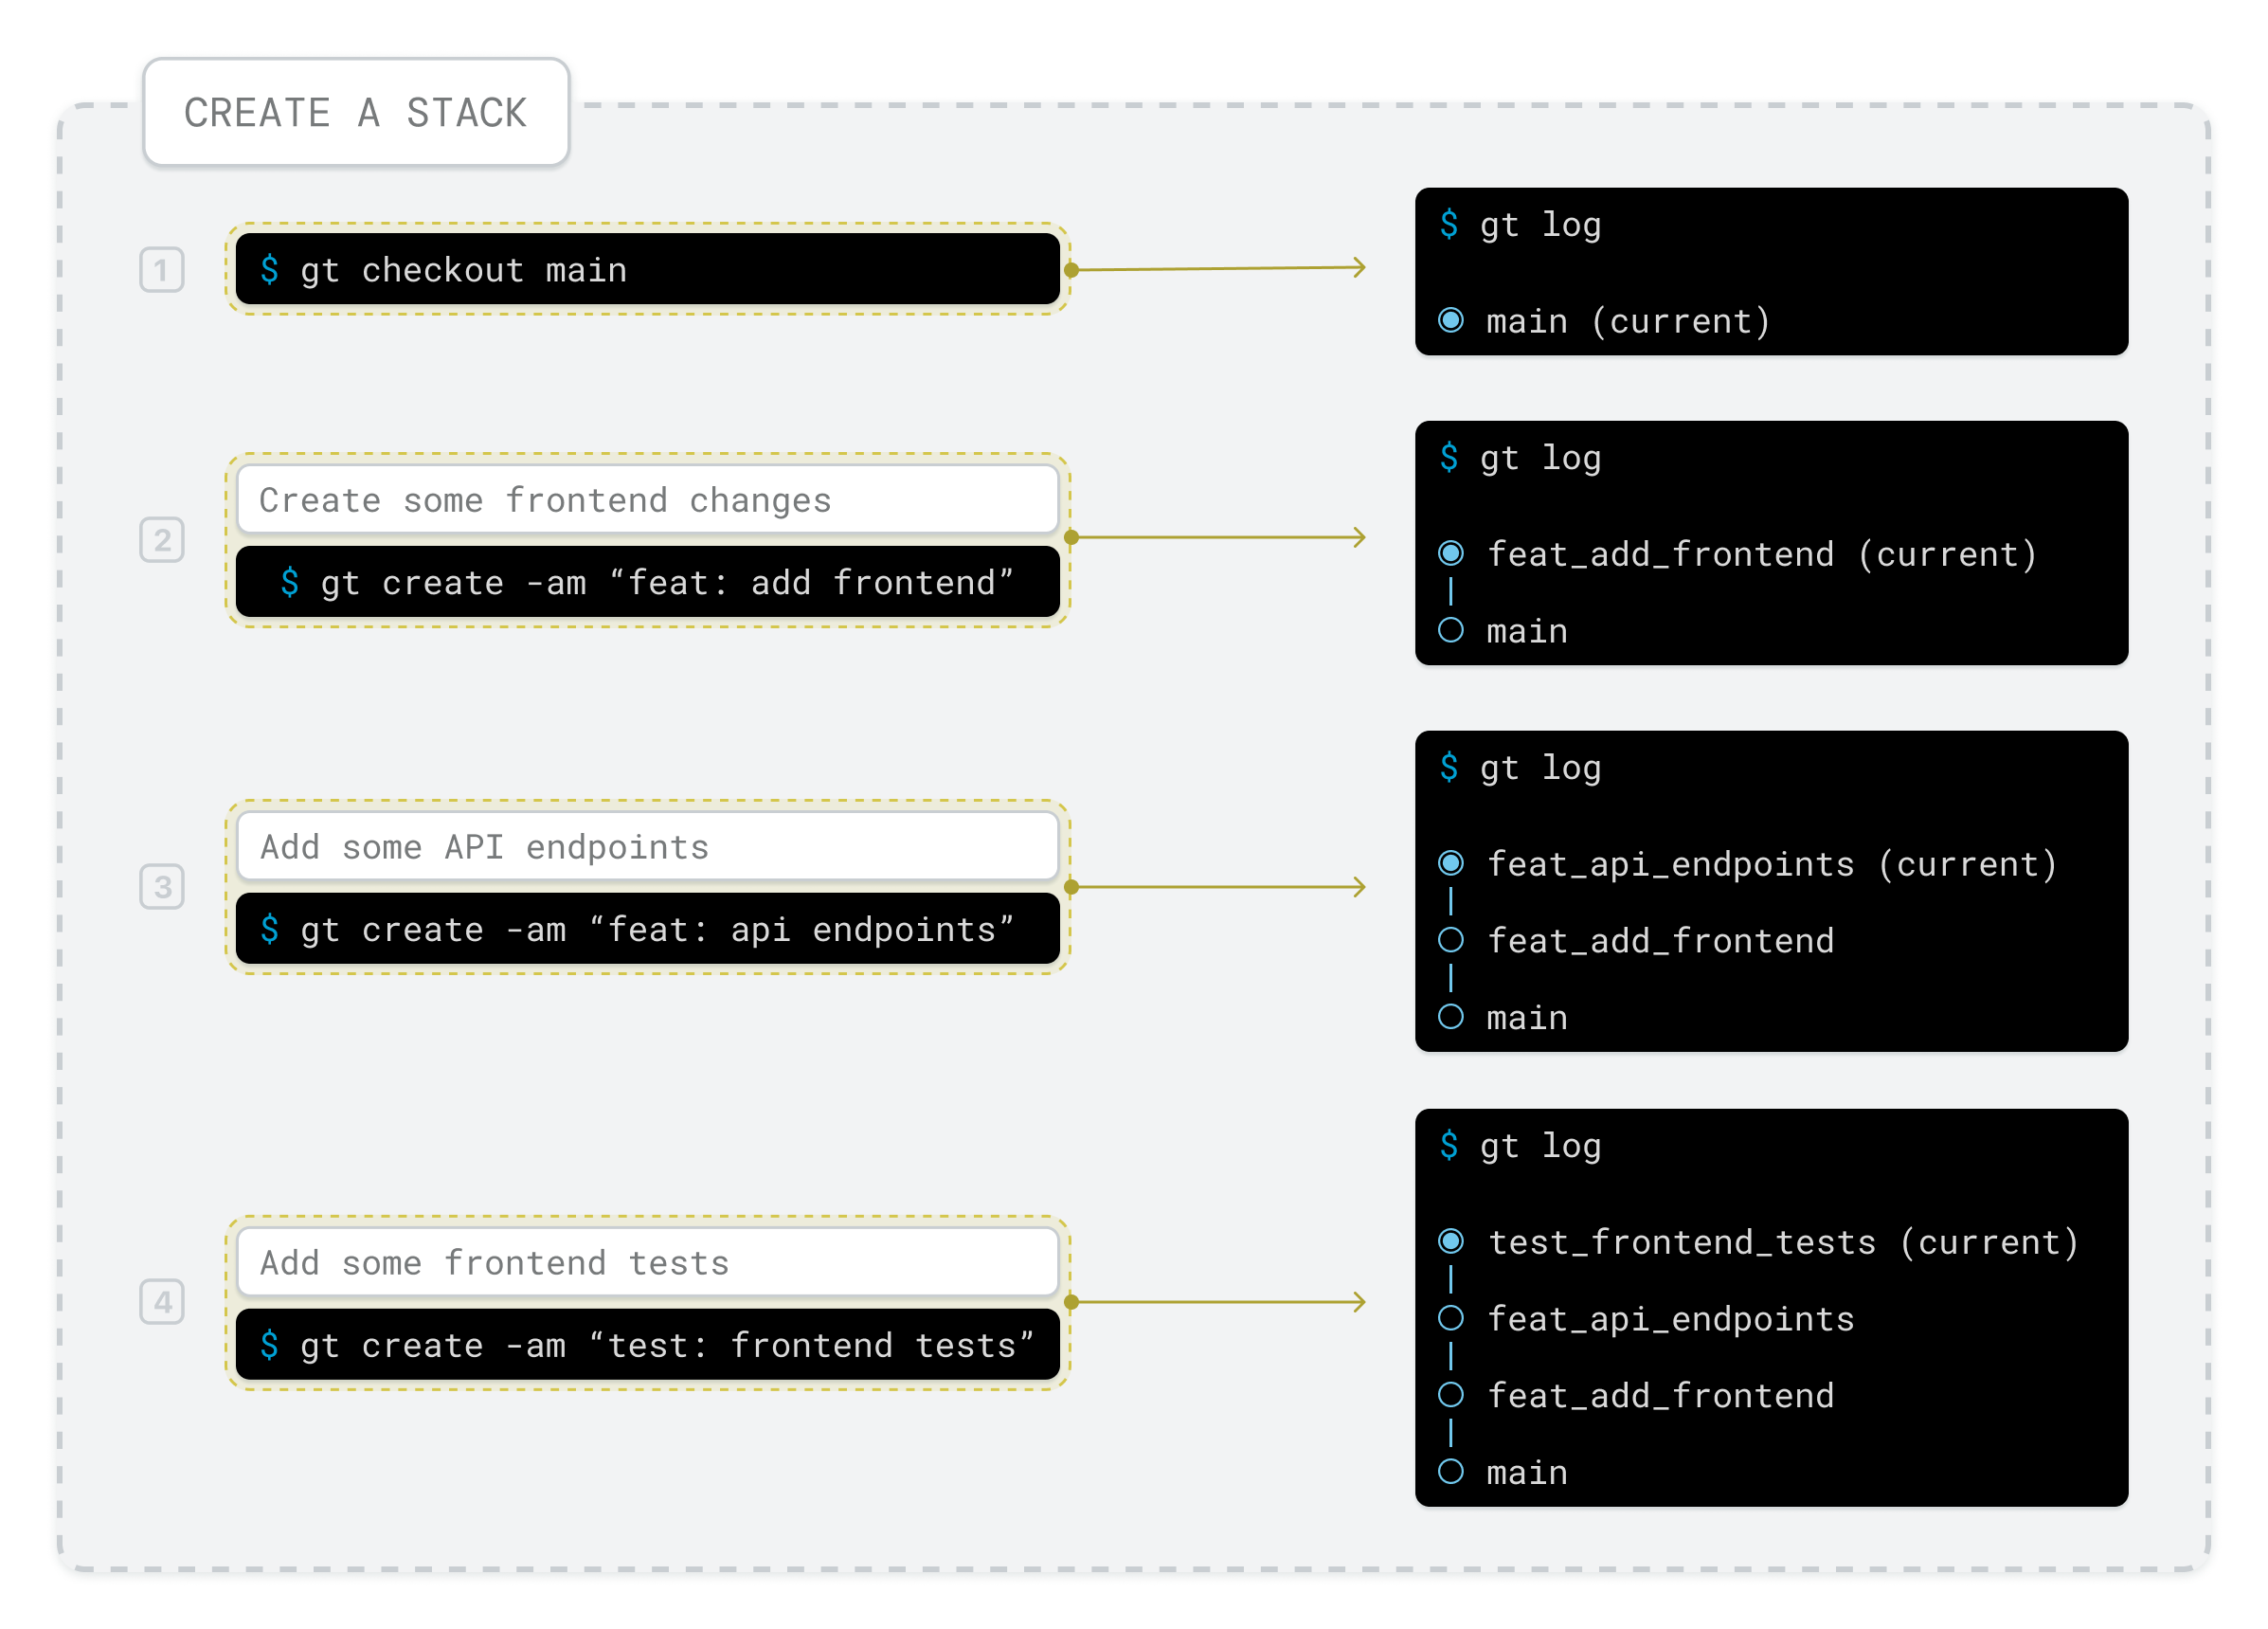
Step 2 - Create a stack
Creating a stack is simple: start by entering a git repository and ensuring you have themain branch checked out. After that, create some changes and run:
Note: the--alltag automatically stages all unstaged changes when creating a branch. You can drop this flag if you’d prefer to stage your changes manually — see all of the flags supported bygt createin the CLI command reference.
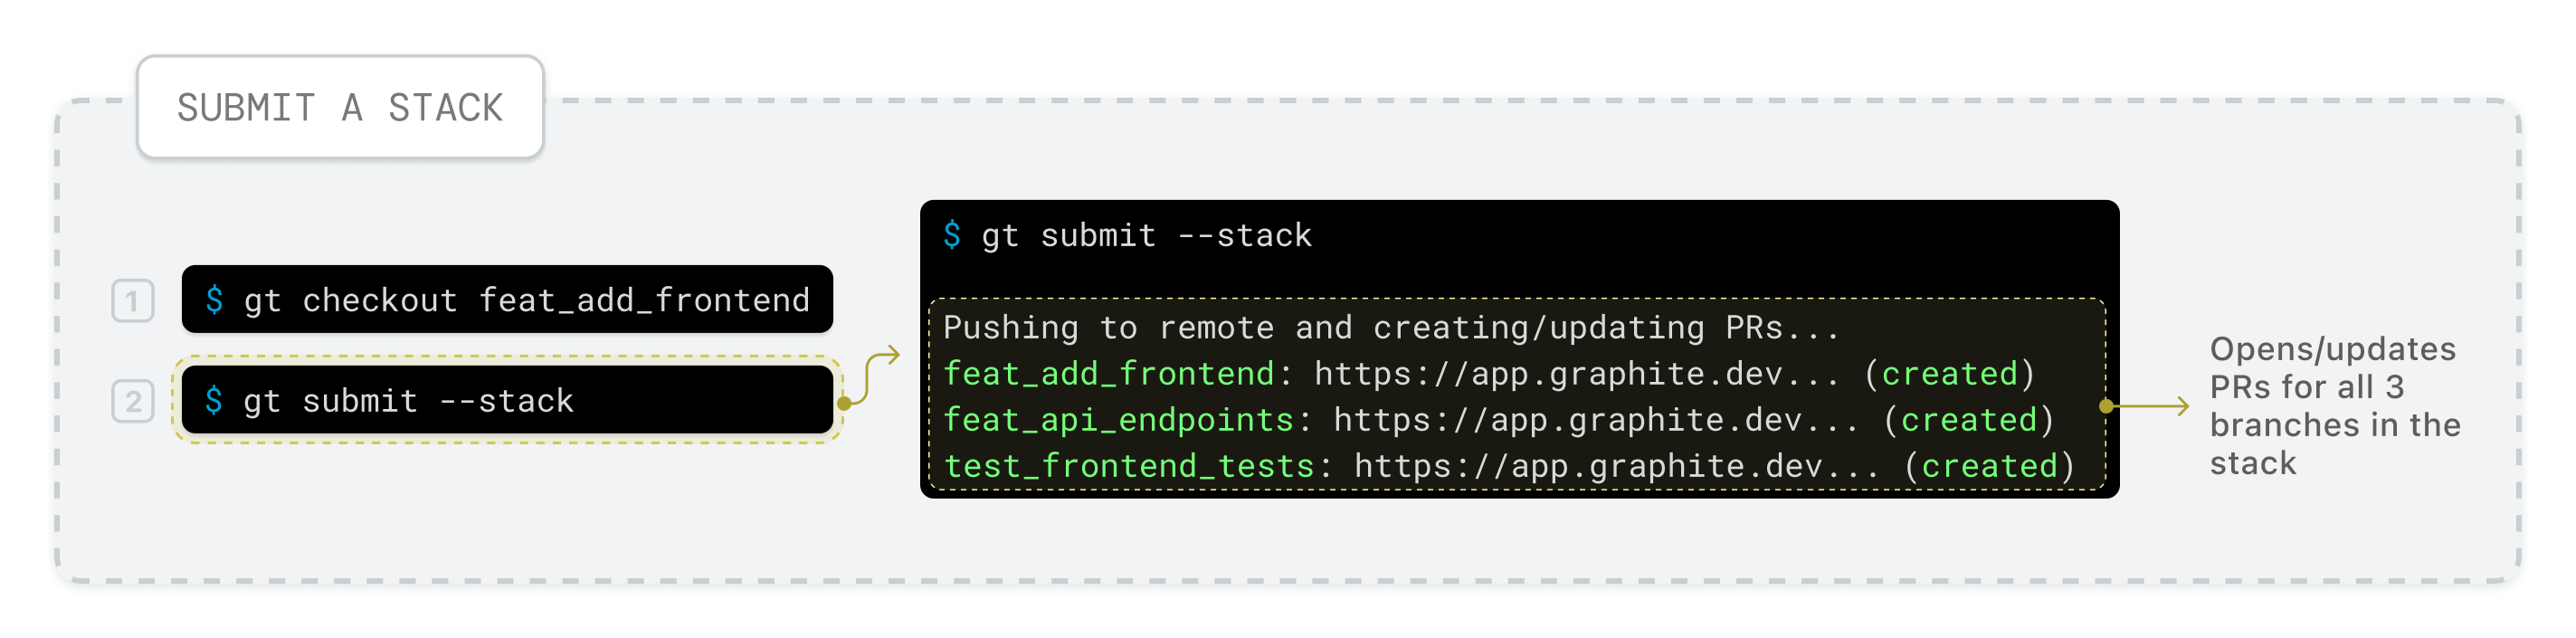
Step 3 - Submit a stack
When you’re ready to put your stack up for review, you can do so by running:If this is your first time installing the CLI, you’ll be prompted to authenticate the CLI with your GitHub account to submit PRs through Graphite. If you’re not ready to do so, you can skip this step.
Submit accepts many different flags — chances are, there’s a flag for your desired submit behavior. Check out the supported flags in the CLI command reference.
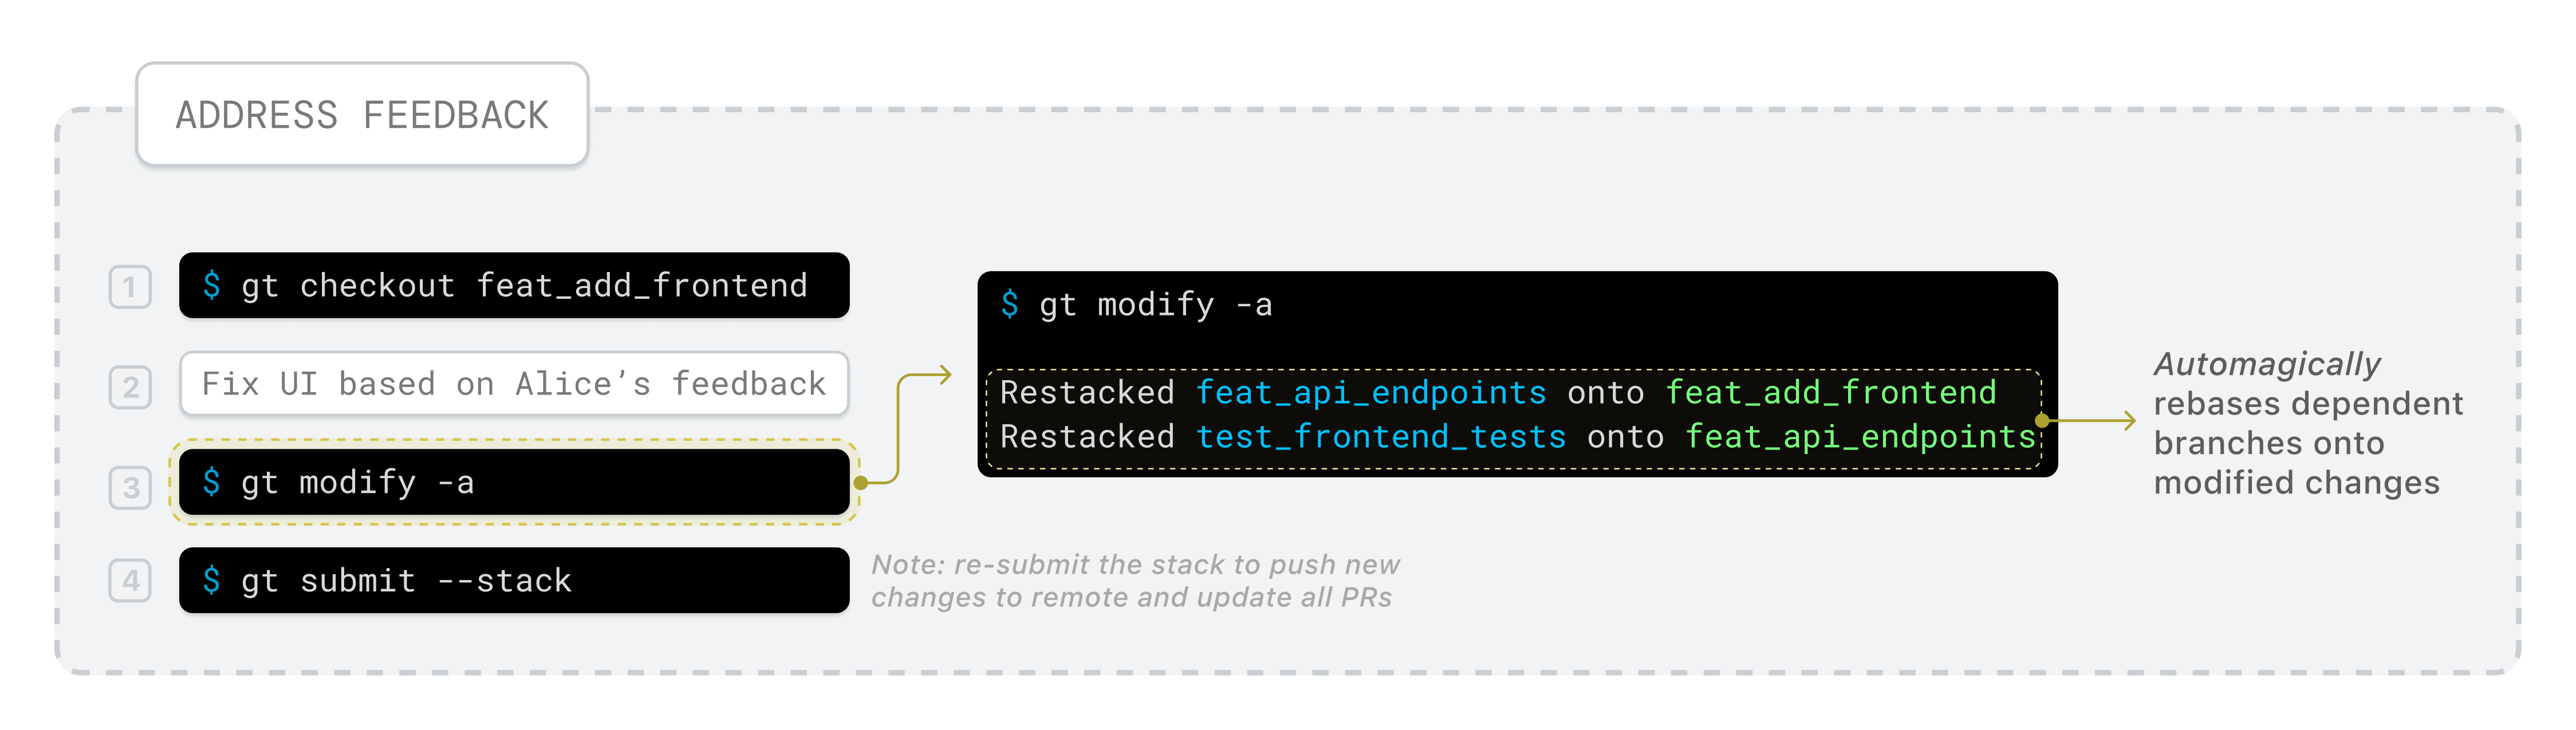
Step 4 - Address feedback
After putting your stack up for review, you may need to make changes based on feedback from your reviewer(s). To do so, check out the desired branch and run:Note: By default,gt modifyamends the last commit on the branch. To create a new commit, usegt modify --commit. See more flags formodifyin the CLI command reference.
Step 5 - Merge a stack
While it’s possible to merge PRs created with Graphite through GitHub, we strongly recommend merging stacks of PRs from Graphite since you can merge all your PRs in the stack at once! Graphite will handle all of the rebasing/merging for you. To do so, navigate to theapp.graphite.dev... links outputted by the CLI, navigate to the top of the stack (in this case, the dropdown next to the PR should say 3 of 3), and click the Merge 3 PRs button.
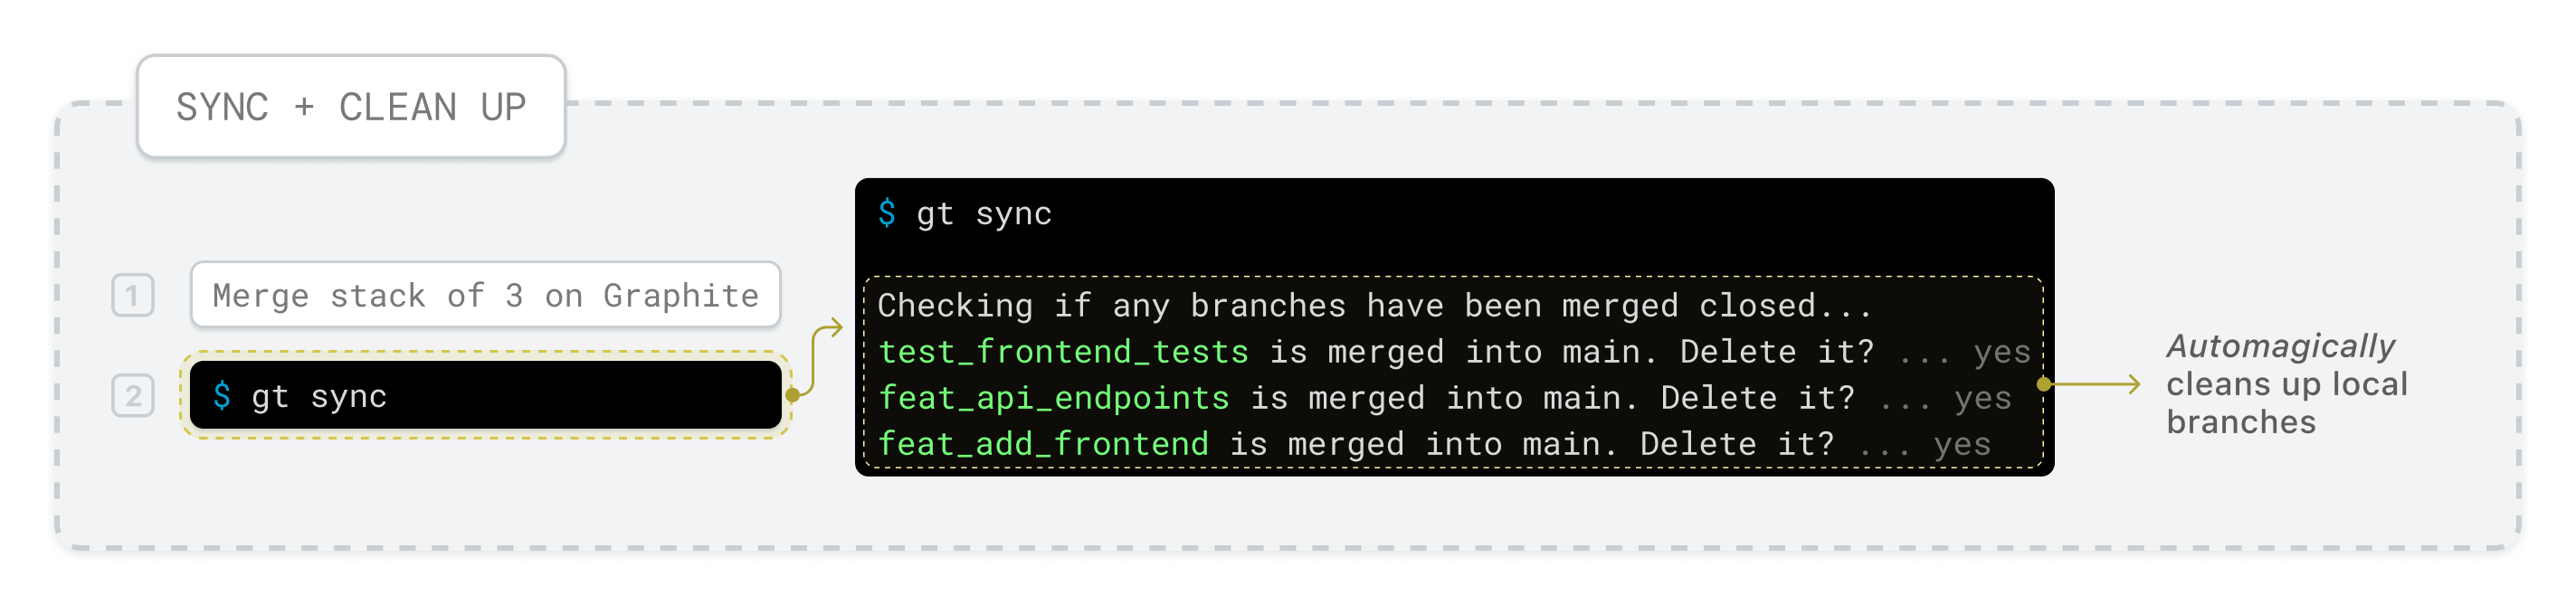
Step 6 - Sync + clean up
Once you’ve merged your stack intomain (or whatever your base branch is), run:
main’s latest changes. In addition to fetching updates, sync:
- Automatically detects any merged/closed branches and prompt you to delete them locally.
- Rebases any branches/stacks you have locally onto the newest changes.
Continuous sync with main
To make sure you’re always working on the most up-to-date version of your base branch, make sure you’re frequently runninggt sync throughout your workflow.